Assembly
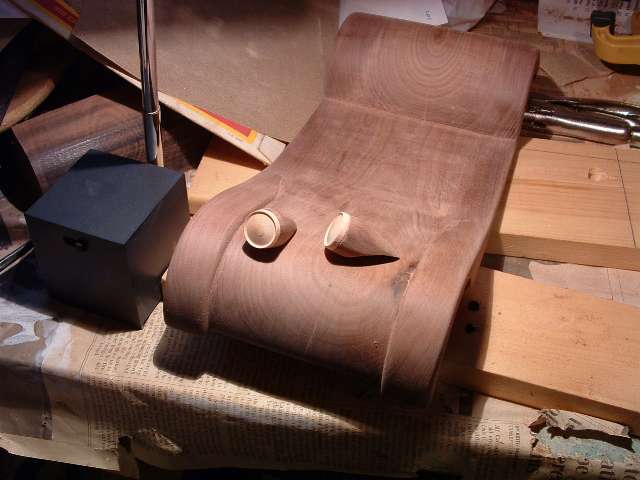
Fine sand the body. Keep some saw dust to make filler. Mark the bonnet and door outlines shown in the blueprints and then carve them out using a "V" chisel. I got fooled by the fuzzy enlargement of the blueprints and made the tops of the doors horizontal, they should slope down toward the hinges.
Sand the exposed wings on the chassis piece now before the wing tops and nacelles get in the way.
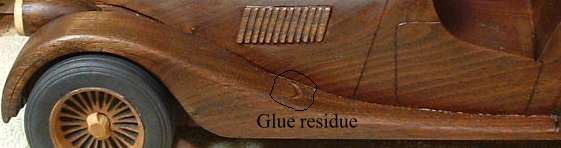
Check fit of body, wing tops, and headlights. Sand/file joint surfaces if needed, but do not go overboard. You will fill the gaps afterwards. For a greater degree of authenticity you can cut back the bonnet edges to leave an obvious gap over the front wing on each side when it is assembled. Glue the upper wings onto chassis' front wings. Do not run the glue all the way along to the trailing end, the glue residue exposed after sanding the wing top's curve into the chassis causes an uneven penetration of the Tung oil finish.
Sand tops of front wings with drum sander on the drill press to blend them into the curve of the wings on the chassis. Round off outer edge of wings (front and rear) with 1/4" quarter round router bit.
Carve/file the curve of the wings in the right angle corner where front and rear wings meet.
Sand corners and sides of the wings.
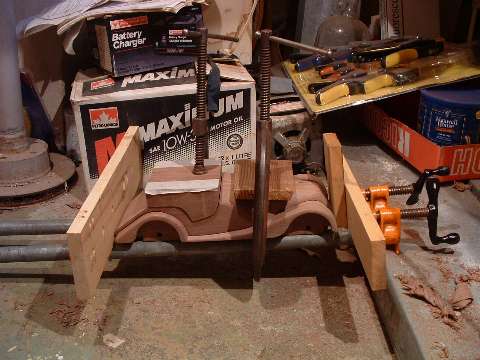
Glue the body to the chassis. Because of the saw kerf the two pieces do not mate perfectly, you need to use the pipe clamps to press the ends of the top onto the chassis. First arrange the chassis and body on the pipe clamps and after applying the glue tighten down the "C" clamps. I used the side cutoffs to help centre the body on the chassis. Then tighten the pipe clamps to press in the cowl and rear deck. Use the cutoff from the cockpit in the "C" clamp to protect the workpiece.
After the glue sets, inspect for gaps between the body and chassis, and between the wing tops and chassis. Make some filler from sawdust and glue and fill all gaps except where the bonnet should show some gap above the front wings. When the glue dries, sand the filler smooth.
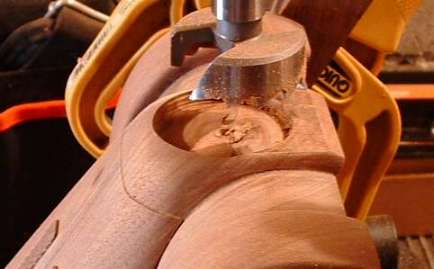
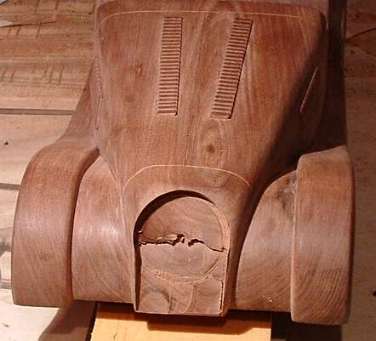
Cut the radiator grill opening. Set the table of the drill press at 60 degrees and use a 1 1/2" Forstner bit to countersink the grill opening. Finish the opening with a dovetail saw and a chisel. Because the cowl gets squeezed in the gluing I cannot give an exact depth to drill, but it is about 3/16". I also had to taper my grill opening a little or I would have removed all the wood at the bottom, I must have been too vigorous with the rasp when shaping the cowl.
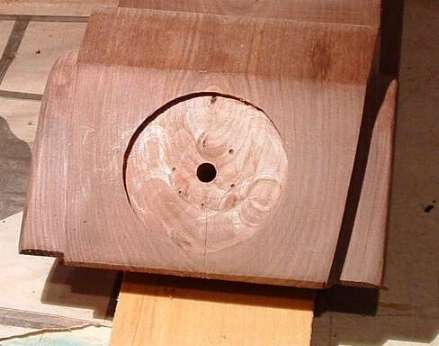
Mark a 2 1/2" diameter circle (1 1/4" radius) on the rear deck where the spare tire goes.
Drill a 5/16" hole for the wheel retaining pin in the centre of the rear deck.
Use the 1 1/2" Forstner to drill the spare wheel well 1/16" deep on rear deck. make several cuts, then router out the rest of the circle. (Or buy a 2 1/2" Forstner bit to do the job in one go.)